Importance of quality control in steel industry
Imagine you are stepping into the newly renovated Santiago Bernabéu stadium for the first time. The grandeur and modern design leave you in awe. As you take in the sleek, shiny stainless-steel panels that adorn the exterior, adding a touch of elegance and modernity to the iconic stadium, you cannot help but marvel at the craftsmanship. These panels are not just for structural integrity; they play a crucial role in the stadium’s aesthetic appeal, reflecting light and creating a visually stunning effect.
However, as your eyes wander across the surface, you notice glaring defect on one of the panels. It is a tiny imperfection, perhaps a scratch or a dent, but it stands out against the otherwise flawless expanse of steel. This single flaw disrupts the seamless beauty, drawing your attention away from the overall magnificence of the stadium. It is a reminder of how even the smallest defect can impact the visual and structural integrity of such a large project.
This is an unreal scenario since all the approximately six thousand stainless steels sheets have been inspected using ISR Specular Vision Technology installed at Acerinox Europe plant. In any case, it highlights the critical importance of advanced inspection technologies at the stainless-steel sector, used to provide high aesthetic surfaces. Considering this or any other example, such as the stainless-steel panel that covers the door refrigerator you are buying to renew the aesthetics of your home, ensuring every steel panel is perfect is paramount.
ISR Specular Vision linear inspection systems for steel are designed precisely for this purpose. These systems use cutting-edge technology to meticulously scan and detect even the smallest imperfections, as will be exposed below. By identifying and addressing these defects early in the manufacturing process, these inspection systems ensure that only the highest quality materials are produced, maintaining the aesthetic standards of any project that may arise. Also, by reducing scrap material and material reprocessing requirements, an eco-friendlier productive process is achieved. Apart from its noticeable benefits, this point can be a key factor for a steel productor considering both the perception that the general consumer has of your brand and the restrictive anti-pollution regulations in some countries.
How does OIT linear inspection systems work?

At ISR Specular Vision, we have been at the forefront of developing advanced inspection technology for the steel sector since 2020. Our journey began with a mission to revolutionize the way defects are detected in the steel industry, partnering with leading companies across Europe and the United States. By leveraging our experience and deep understanding of the industry’s needs, we have created a robust and reliable inspection solution that meets the highest standards of quality and precision.
Our technology centers around linear image capture systems, a method that scans materials line by line, providing a detailed and comprehensive view of the steel surfaces. This type of imaging technology is particularly effective because it captures continuous, high-resolution images that allow for the detection of even the smallest imperfections. Linear imaging is akin to having a magnifying glass that meticulously examines every inch of the material, ensuring that no defect goes unnoticed. Further info about the linear technology can be found at previous entries of ISR blog.
Our systems are designed to be adaptable and scalable, making them suitable for a wide range of industrial environments at various applications.
But let us get real for a moment. Beyond all the theory and technical jargon, ISR Specular Vision adds significant value by customizing these systems for each specific location. Our systems are designed to withstand a variety of challenges, including the hardest impacts, extreme temperatures from annealing ovens, metallic dust from oxide grinders, fluctuating lighting conditions, and a host of other external factors that do their best to disrupt proper functioning.

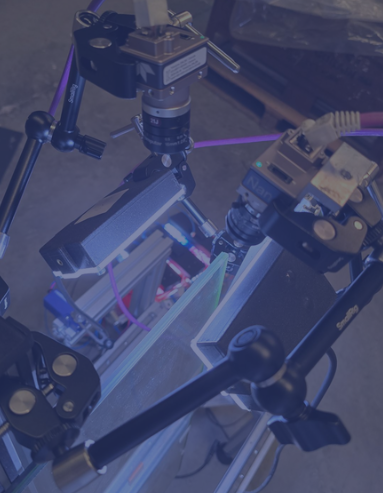
As can be seen at the previous images, to withstand all these external factors, all our inspection systems intended for steel sector include the following elements:
- Metallic structures for precise positioning of main vision elements. We must keep in mind that for the most precise systems, the Depth of Focus (DOF) of the vision assemblies can be lower than a millimeter. For that reason, cameras positioning during the inspection is going to be a key factor to achieve a precise inspection.
- Protection structures for avoiding impacts. Let us consider a continuous line where the end of a 12 mm thickness coil is soldered to the beginning of the following one to be processed. In case the beam is not correctly performed, you will get a horrendous blade moving directly towards your inspection system. Luckily, the protective structure independent from the inspection system will be able to manage this situation (amongst others).
- Specifically designed linear lighting systems will be able to provide enough lighting for a correct image acquisition (after all, how else could we ensure a flawless surface inspection!?). These systems use precisely calibrated LED arrays to create uniform illumination across the entire surfaces. The controlled lighting enhances the contrast of the images, making it easier for the inspection software to detect even the smallest imperfections. Additionally, the linear lighting systems are adjustable, allowing for fine-tuning of the light intensity and angle to suit different inspection environments and material properties.
- All sensitive components, including cameras, controllers, processing units and PLC, are housed within sealed enclosures equipped with positive pressure and air conditioning systems. These measures ensure protection against metallic dust, maintaining the optimal performance and longevity of the equipment in harsh industrial environments.
- Linear guides for allowing a maintenance retraction, intended to allow maintenance works over the inspection system or the production line considering short preparing times, which also is conceived as a Key Performance Indicator (KPI) of these inspection systems.
After diving into all this theory, you are probably eager to see some real-world examples of these solutions in action within the industry. Seeing how these advanced inspection systems operate in various industrial settings will provide a clearer picture of their capabilities and the tangible benefits they offer. So, let us take a look at some of these practical applications and see how ISR Specular Vision’s technology is making a difference.
Examples of Optical Inspection Technology (OIT) for steel
Now, let us explore our highest precision system, capable of detecting pinpoint defects as small as one hundred microns, even smaller considering the latest updates requested by the system final user. Considering that every system is installed at a specific location, at the following images we can see the same system developed for different scenarios and ensuring its performance, reliability, and maintenance.


The previous images, highlighting our inspection systems, were undoubtedly impressive from an integration standpoint. They demonstrated how seamlessly our technology can be incorporated into the steel production process. However, now that we have systems capable of withstanding the harsh conditions of steel manufacturing, it’s time to focus on the inspection results themselves. This is where the true value (and payback) lies, ensuring the highest quality standards in steel production. Let us delve into these inspection outcomes and understand the impact they have on the production process.
Let us first focus on a common defect known as «scale,» which refers to small patches of residual rust on the surface of the material. Any steel, including stainless steel, tends to oxidize during the hot rolling process. To remove this superficial oxide layer, a process called pickling is performed using scraping brushes and acid. If this process is not conducted properly or production parameters are not correctly tuned, residual rust stains can remain. When these stains exceed one hundred microns, they are considered a defect that can significantly devalue the produced material. Detecting and addressing such defects is crucial to maintaining the quality and market value of the steel.

In the industry, considering that production is a continuous process, detecting these types of defects as close as possible to where they originate is crucial for timely correction. This proximity prevents large sections of the steel coil from being classified as second-quality material. If a human performs the quality control, they cannot be placed near processes involving acid, metallic dust, or the elevated temperatures of furnaces due to occupational safety concerns. Consequently, the operator must be positioned far from the defect’s origin, typically detecting it an average of two hundred meters downstream. By this time, between 20 and 26 tons of material might be classified as second quality, thereby reducing its market value. Additionally, once the operator adjusts the production parameters according to the info being displayed at the User Interface, they must wait another two hundred meters to see how the new settings affect the material’s aesthetic properties.
By reducing this 200-meter gap to just ten meters and equipping the system with the precision of automatic detection, much less material is wasted, and the production process can be adjusted far more efficiently. This proximity ensures that defects are identified almost immediately, allowing for rapid adjustments, and minimizing the amount of substandard material produced (again, a quick payback is achieved for these inspection systems). The result is a more streamlined, eco-friendly, and cost-effective production line, with higher quality output and reduced material loss.
In conclusion, the following points can be highlighted:
- At steel sector, precise visual inspection is a key factor considering both product quality standards, cost reductions and carbon footprint of produced material.
- Technology integration, considering production line peculiarities and non-friendly environments, will be a key factor for ensuring inspection system performance.
- ISR Specular Vision has been able to develop a cutting-edge system able to fulfill steel industry highest requirements, being able to find a one hundred microns defect in a one-kilometer-long steel coil.


