Defectology, in the context of industrial production, refers to the systematic study, detection, and analysis of defects within manufacturing processes. It involves using advanced technologies and methodologies to identify and categorize these defects in different products. Our defects are not easy ones! The OIT systems characterize defects up to 0,1 mm. In this article we will focus on defects created by injection and coating processes in automotive sector. Let’s go for it!
Importance of quality control in manufacturing
Quality control in manufacturing is a systematic process aimed at ensuring that products meet predefined quality standards and specifications. It involves various activities and procedures designed to detect and prevent defects, ensuring that the final products are safe, reliable, and meet customer expectations.
In this regard, ISR Specular Vision operates in the field of computer vision, which is based on various disciplines, from computer science to artificial intelligence. Its main objective is to enable a system to interpret and understand the visual content present in images, like how a human does.
Progress in this field has intensified in recent years due to various advancements, ranging from hardware topics like high-resolution cameras to software developments such as more complex image processing algorithms and machine learning techniques. This convergence between hardware and software development has allowed computer vision to reach a level of precision and efficiency in various industrial fields.
Summarizing, quality control in automotive manufacturing is a discipline that is essential for ensuring compliance, and customer satisfaction. In an industry where the stakes are high, and competition is fierce, robust quality control processes are not just a necessity but a strategic advantage that can define a manufacturer’s success.
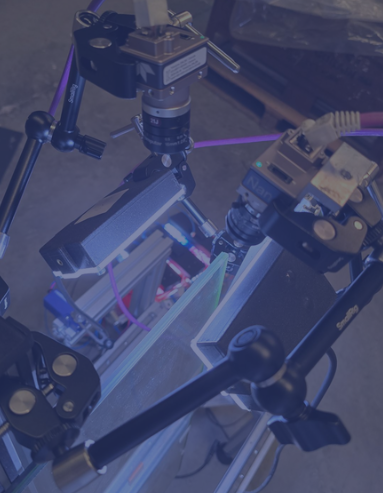
For better understanding, it is necessary to briefly reminder the term OIT, the main principle in ISR solutions. OIT refers to Optical Inspection Technology, automatic inspection of the aesthetic quality of parts and components with specular surfaces (transparent and reflective) using artificial vision equipment and patented lighting systems. ISR markets these solutions to multinational clients in the industry sector with high aesthetic standards and stringent quality control. These systems consist of an integration of technologies that, after being designed by a team of engineers, form an industrial inspection system for a wide variety of parts and surfaces. Additionally, these systems are as comprehensive as the inspection and aesthetic quality control needs demanded, as well as the restrictions of the area where the system will be integrated.
What kind of defects OIT can find?
The OIT (Optical Inspection Technology) systems developed by ISR can detect various defects originating in the production process of injected and coated manufactured parts. Distinguishing them according to their origin, the following defects are identified:
Injection Machine:

Cold Slugs:
- Description: This defect is usually found near the gate where the melt enters the lens, but it can also be found further away from the gate.
- Main Cause: Cold slugs are caused when a small “slug” of cooler melt from the molding machine barrel, nozzle, or the hot manifold system, makes its way past the cold slug catch wells in the runner system and gets into the lens.

Flow Marks:
- Description: Visible lines on the surface of the part caused by uneven flow of molten plastic in the mold.
- Main Cause: Uneven flow of molten plastic within the mold, usually due to incorrect injection temperature, poor mold design, or inadequate injection speed.
Weld Lines:
- Description: Visible lines on the surface of the part where two fronts of molten plastic meet and solidify.
- Main Cause: Meeting of two fronts of molten plastic that do not properly fuse due to insufficient melting temperature or incorrect injection speed.
Scratches:
- Description: Surface damage to parts that affect the appearance and perceived quality of the product.
- Main Cause: Damage caused during demolding or subsequent handling, such as improper handling or inadequate demolding equipment.
Warping or Distortions:
- Description: Parts that do not maintain their correct shape, affecting their functionality and appearance.
- Main Cause: Warping during cooling due to inadequate cooling times or temperatures.
Foreign Material Inclusions:
- Description: Presence of foreign particles within the injected plastic, visible in transparent parts.
- Main Cause: Contamination of the plastic material with remnants of other materials or foreign particles during injection.
Burn Marks or Discoloration:
- Description: Dark spots or discolorations on the final part, affecting its aesthetics and mechanical properties.
- Main Cause: Overheating of the plastic material during the injection process due to excessively high temperatures or prolonged cycle times.
Lack of material:
- Description: Areas without material in the final part because the mold does not completely fill.
- Main Cause: Insufficient amount of plastic injected into the mold, low injection pressure, or a defective mold feeding system, such as poorly designed or blocked flow channels.

Air Bubbles:
- Description: Visible air inclusions in the transparent part, which weaken the structure and affect the appearance.
- Main Cause: Air trapped in the plastic during injection, which can occur due to too high injection speed, inadequate mold venting system design, or moisture in the material.
Coating:
Orange Peel:
- Description: Irregular surface texture resembling the skin of an orange, visible on varnished parts. Main Cause: Incorrect application of varnish, usually due to improper varnish viscosity, incorrect spray pressure, or inadequate distance and speed of the spray gun relative to the part.
Varnish Drops:
- Description: Formation of varnish drops or runs on the surface of the part, affecting the uniformity and aesthetic of the finish.
- Main Cause: Excessive varnish application, excessively high spray pressure, or improper movement of the spray gun, as well as issues with varnish viscosity.
Dust Inclusion:
- Description: Presence of dust particles on the varnished surface, visible as white spots or imperfections on the part.
- Main Cause: Contaminated varnishing environment, lack of proper cleaning in the spray booth, or improper handling of parts before the varnish fully dries.
Stripes and Scratches in the Varnish:
- Description: Surface damage to the varnish affecting the appearance and perceived quality of the product.
- Main Cause: Improper handling of parts after varnishing, or use of inadequate handling equipment causing stripes and scratches on the surface.

Opacity or Haze in the Varnish:
- Description: Finish that is not completely transparent, presenting a cloudy or hazy appearance.
- Main Cause: Varnish contamination, improper mixing of varnish components, or inadequate drying conditions such as high humidity or incorrect temperature.
Varnish Peeling:
- Description: Areas where the varnish peels or flakes off the part surface.
- Main Cause: Inadequate surface preparation before varnishing, such as insufficient cleaning or lack of proper adhesive, as well as issues with varnish quality or formulation.
Uneven Gloss:
- Description: Variation in glossiness of the varnished finish, resulting in areas of the part that are more opaque or shiny than others.
- Main Cause: Uneven application of varnish, issues with varnish component mixing, or inconsistent drying due to variations in temperature or humidity in the drying environment.
Summarizing key points
Summarizing, this is what we learned in this article:
- Quality Control: Ensures products meet quality standards, enhancing safety, reliability, and customer satisfaction.
- Optical Inspection Technology (OIT): ISR’s OIT uses artificial vision and patented lighting for inspecting aesthetic quality, particularly in transparent and reflective surfaces.
- Types of Defects Detected by OIT:
- Injection Machine Defects: Includes cold slugs, flow marks, air bubbles, cloudy swirls, weld lines, scratches, warping, foreign material inclusions, burn marks, and lack of material.
- Coating Defects: Includes orange peel, varnish drops, dust inclusion, stripes and scratches, opacity or haze, varnish peeling, and uneven gloss.
Written by: Ángel Troyano


